This article documents how I fixed a Samsung Galaxy Tablet 7 inch from a no boot state. The problem was corrosion in the charging socket. Note that this advice is given with no responsibility if you try it yourself. Enjoy!
A friend had his Samsung Galaxy Tab 7 play up. The symptoms were:
1. Tablet device would not charge - red cross over battery icon when charger plugged in.2. Device battery ran flat and shut down3. Device would not switch on, even after using various techniques found online to fix "no boot" issues. (Hold power button for 10 to 15 seconds, reseat battery connector)4. Device could go into "download" or "update" mode - If connected to the charger, pressing Volume Down and Power button would put the device into its download mode. (Construction looking image of a droid digging in the dirt with message saying download mode, do not turn off the target.5. Device would not boot with known good working battery.6. Battery from device would work in known good working device.7. Upon opening, it was apparent the circuitry to the charging socket had become corroded. (See images below)
Due to the corrosion, I diagnosed as faulty motherboard. But upon looking online, you can't seem to buy SGT7 mainboards from anywhere. What to do? Clean the corrosion!
Step by Step Guide - Opening Samsung Galaxy Tab 7 and Repairing Corrosion/Corroded Charging Jack/Socket
The first step is to open the case. I followed a video guide from DirectFix.com and you can find their tear down video on YouTube. It is here. Here is a step by step with photos:
Remove the two twi-wing screws either side of the charging socket - There are 2 tri wing screws at the bottom of the tablet. They are under the black circles. Pry the black circles off with a small flat head screwdriver and place them somewhere safe. Remove the two screws with an appropriate sized tri wing screwdriver.
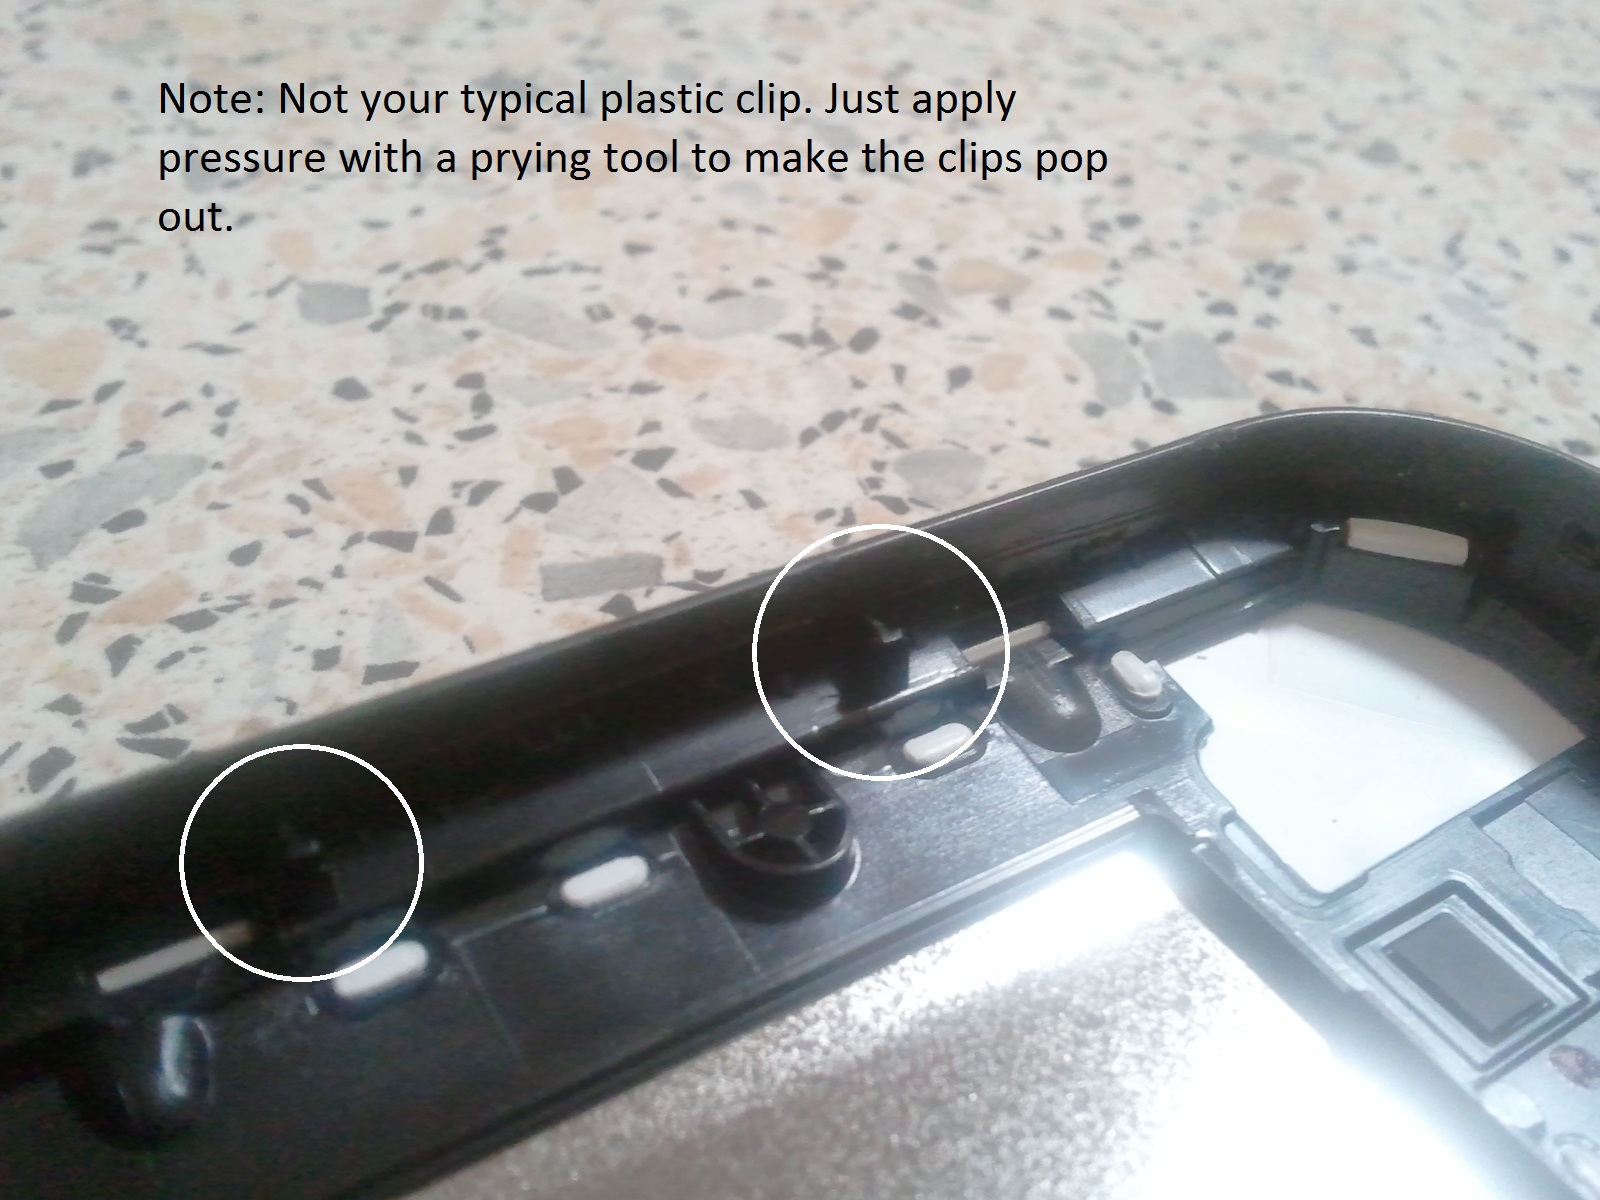
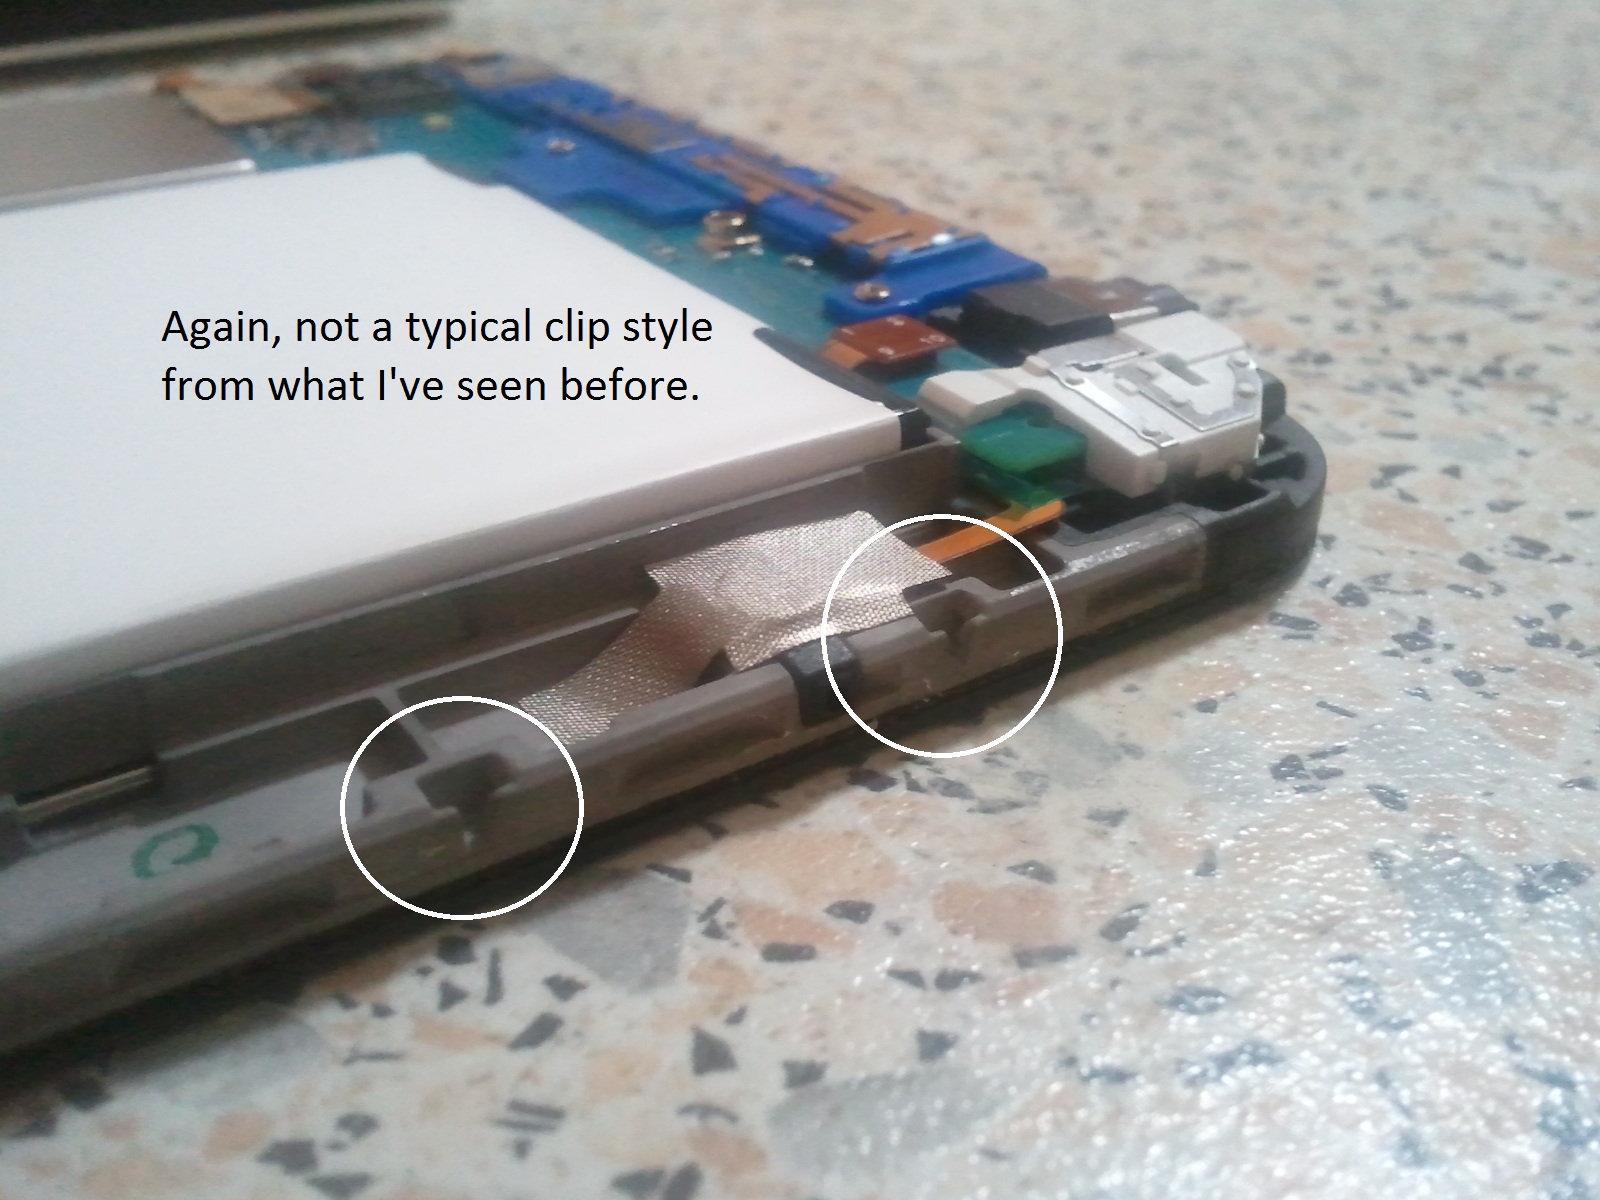
Next, unclip the back cover from the rest of the tablet. You will need either a prying tool, a small flat head screwdriver or some solid fingernails to do this. Using fingernails can get painful, so I recommend having a tool handy. Note in the following picture the location of the clips:
Note that there is 1 or 2 between each slot and button on the side of the buttons. I don't think there are any on the bottom (as this is held by the screws) so start prying at the bottom and work your way up the sides to the top. Also note that the clips on this tablet are not the standard clip you would find on most electronics like laptops. Most clips are a hinge-and-push/pull style clip. These ones do not have to hinge, they just push in and out of their slots. See the following images to get an idea of what I'm saying.
Next, unclip the battery and remove the battery screw. The battery clip can be unplugged by lifting it upward with a prying tool. See images:
Remove the 7 mainboard screws as indicated. Use a correctly sized plus head screwdriver.
Unplug the 6 flex cables from the mainboard. Note that the camera lifts out once unplugged. Do not lose it.
The mainboard will now lift out from the screen casing.
At this point, I inspected the charging socket and found it was rather heavily corroded. There was even some corrosion on the back casing!
To fix up the corrosion, some "CRC 2-26" electrical cleaner spray was applied to an old (or new?) toothbrush and lightly scrubbed the corroded areas. Don't ask me where to buy this stuff, my brother flogged this off our friend after he used all my brother's motor oil. It's likely that he stole it from his work and he is an [overpaid] electrician of some sort. After cleaning and allowed to dry, we did a boot test. It booted fine. However, we noticed about 3 of the wirings coming from the socket were heavily eroded, one was almost half missing. So we applied a layer of the PVC-U Pipe Cement over the top of all the wiring coming from the socket to insulate them. Hopefully this will reduce the rate of corrosion in the future. See images below:
After application the device booted fine. The PCV-U Pip Cement is usually used to glue PCV (or, coduit) pipes together and is common for plumbers and electricians to have. You can buy it at every hardware store, or steal some from your RICH plumber/electrician friend. The pipe cement is like a plastic when it dries, so it can be peeled off later and will act as an insulant.
What causes corrosion like this?
Well in this case, the blame is being put on salt water splashed from a salt water pool, but my friend also lives very close to the beach. Any beachside electronics will rust away rather quickly due to the high salt content in the air. Considering the charging port on the device is practically the only place for the salty air to get in, it seems likely the beachside location would have contributed to the corrosion.
I also encountered these problems when I serviced Dell computers for a year or so. All beachfront areas would have the electronics rusting out rapidly compared to locations away from the beach.
How can you prevent a fate like this? Cover up the device when it is not in use. Obtain or make a rubber plug for the charging socket so it is closed up. Another friend of mine literally covers his LCD TV with a sheet because he lives right on the beach. If he didnt it would rust out in a year. And he knows it too.


